Made from 1/4" luan and held together with masking tape. I think I would make the frame elements just a bit wider, they are only about 1 1/2" wide. Two layers of 3/8 " Meranti ply and 1/4" plexi windows. I also want to mount my all around light on top of the unit but it will need to be shielded on the bottom to keep the light out of the helmsman's eyes. Saw a similar design on a Maine built 19 footer.
Saturday, November 6, 2010
Mockup of Windshield Pictures and description
Made from 1/4" luan and held together with masking tape. I think I would make the frame elements just a bit wider, they are only about 1 1/2" wide. Two layers of 3/8 " Meranti ply and 1/4" plexi windows. I also want to mount my all around light on top of the unit but it will need to be shielded on the bottom to keep the light out of the helmsman's eyes. Saw a similar design on a Maine built 19 footer.
More Pics of Mockup
 The measurement to the top of the cabin is 45", to top of windshield 67"
 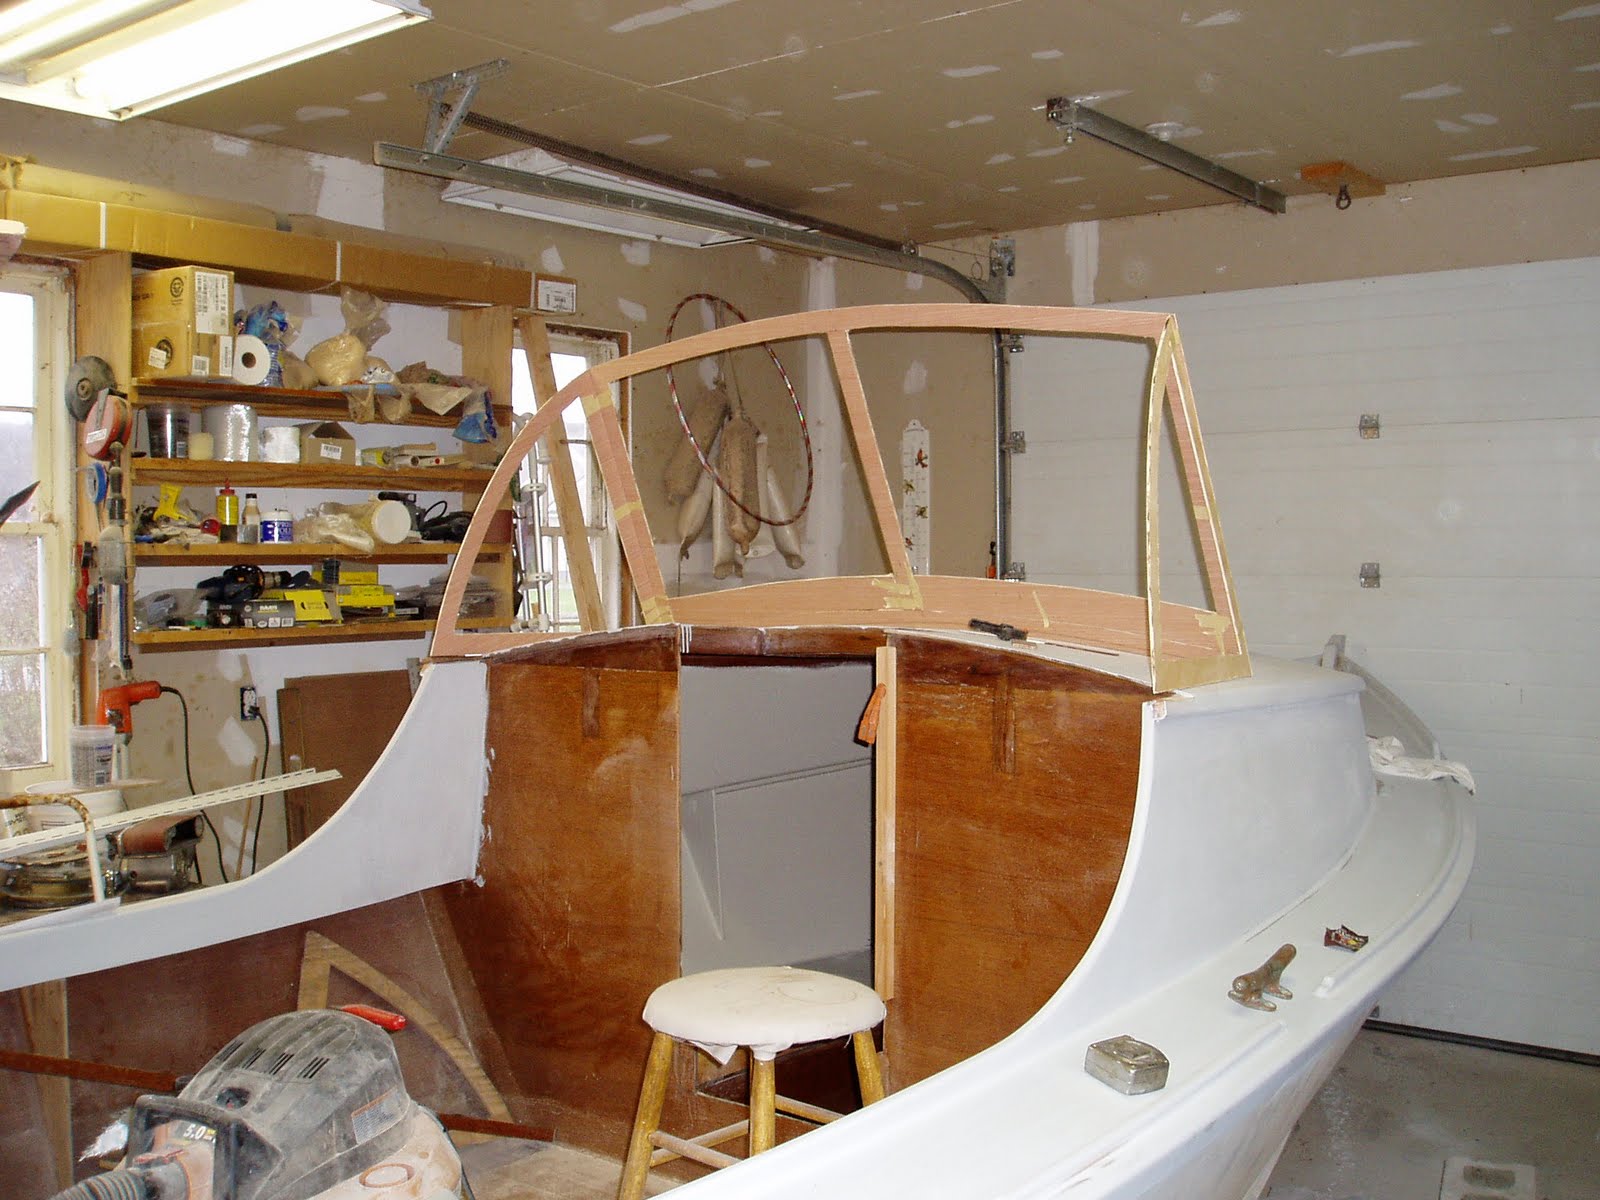 The windshield has a 3" camber, same as the cabin top
 Measuring along the rake of the windshield 27" uniform across width
 Tried to get the line of the coaming to flow into the side screens on a nice sweeping curve
Unfortunately impossible to get a true perspective of the scale I drew a scaled picture of Nina and scaled the windshield and cabin using my actual dimensions and it looks right (to me). I can stand at the helm and look under the top edge of the frame and see all the way to the horizon so am happy with that.
Tuesday, August 31, 2010
Some Views of Nina in Primer
 Nina in primer, (S3 high build, two part). View above of fake stem, buffalo rails and pennant holder. a souvenir of the 2010 Mystic Boat Show.
 view of port side looking forward. I like the gray of the primer against the white hull and may choose that as the color for the topsides. I may paint a sheer strake in the same red as the hull bottom.
 Standing at the helm looking forward.
 At the helm looking aft. The topsides are now finished other than final painting. All that is left is the interior of the cockpit, seating etc. Rear bench seat is roughed it but that's it.
 Motorwell cover ready for final paint.
Windshield Cchoices For Nina
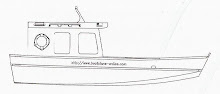
 Mockup of side view of lobster boat type windshield, maybe a good choice for New England?
 Sportfisherman windshield mockup. Maybe a good choice for the Gulf? I really like how the lines blend from the coaming. SWMBO likes this one best. I like the Lobstah one. the lobster windshield would have a hard top, okume ply for light weight, the sportfisher would have a bimini attached to the top edge.
Sunday, August 29, 2010
This next section is on building the cabin top hatch
I decided to build my own cabin top hatch for Tumblehome Nina. I could have save hours of work by buying one but enjoyed the process of designing and building my own. The hatch consists of coamings that are about an inch proud of the cabin top made from 3/8ths Meranti plywood. They are shaped to follow the camber of the cabin top. Crowning the top edge of the coamings is a horizontal layer of 1/4 inch ply by 3/4 inch wide and fit to be flush with the inside of the coamings. The hatch top is fit to sit snugly on top of this layer of 1/4 inch ply. Later a strip of weather stripping will be applied to the inside of the hatch cover to fit directly above the 1/4 inch ply. This will elevate the hatch sides up off the cabin top to provide a drip edge. I am satisfied that anything short of a direct hit by a fire hose will not cause a leak.
There is a recess inside the hatch for a screen panel.
Building The Hatch Cover
 First I placed a garbage bag over the coamings for the hatch to keep the new hatch from bonding to the cabin top or coamings. The sides for the hatch were then placed over the coamings having first been scribed to fit the shape of the hull and glued together at the corners. The sides were just the same height as the top of the coamings.
 The first layer of 1/4 inch was glued to the top of the hatch frame and tacked where needed with bronze ring nails to be removed when all set up. After all was set up the router was used to trim flush and a second layer of 1/4 inch was added for strength and trimmed with a round over bit and covered with 6 oz glass.
 The hatch with the first layer only waiting to be trimmed off. Fits nicely to the camber of the cabin top.
 A possible choice for hinges for the hatch. Probably will use something different though. Very difficult to find hinges for hatches on small boats apparently. Lots of choices for larger hatches but this one is only a little more than an inch and one quarter high.
 A long view of the hatch waiting for me to get back to work and put the camera away!!
Pictures in the next post show the finished hatch.
Saturday, August 14, 2010
My cuddy hatch, fake stem and buffalo rails
 Here is my cuddy hatch, no hardware yet. Top has 2 layers of 1/4 inch okume because I know someone will sit on it.
 Buffalo rails with built in bow chocks. Rails are made up of three layers of 1/4 inch ply.
 Fake stem made of the same 2x fir that I used for my skeg. Great old growth material that was salvaged from an old building. The chocks in the rails just got an extra coat of epoxy to make sure they will be tough enough for the job. No deck hardware installed yet. 6 oz. glass on all flat surfaces including motorwell cover, weave filled and sanded and ready for primer.
Old Boat Show in Burlington Harbor

Some beautiful old boats on display on a pretty day. A couple of Lymans, a Sleeper and a workboat launch, some nice mahogany types from the 50s, a great old Elco 34 footer from 1930 and a motorized launch from 1905 with a hand cranked one lunger. The pictures I took were mainly of building items that interested me. Here are a few detailing hatch construction
 you can click on any one of these to blow up for some more detail. The one below has a deadlite.


Monday, July 19, 2010
The Lake Champlain Maritime Museum
 Bill Hazelett, a local business man, has donated a new building at the museum to house part of the museum/s extensive collection of boats. The new building was necessary because there was no building large or tall enough to house Hazelett/s iceboat, Storm King, a 100 year old of immense proportions. Check out the museum's website for more information
Lift hatches as designed by Fred Bingham
 Here is a page from Bingham's excellent book on wooden boat joinery. The hatch design I chose was A as the simplest of the designs and one that I felt would be adequate for the conditions that Nina would face. At this point I have installed the coamings that are the immovable part of the hatch along with an innovative addition of a lip designed to turn back water before it could overwhelm the fixed coaming. (see additional postings) When the epoxy has set up I will sand, trim, round over and saturate exposed wood. The next step will be to build the lift hatch itself which will consist of 3/8 inch sides and 1/4 inch ply top. The final steps will be glass and hardware.
Making progress on Lift Hatch
 3/8 x 3/4 inch lip added to the top of the hatch coaming.
 The lip protrudes 3/8 inch beyond the coaming and will turn back (I hope) any water that surges against the coaming. The hatch is, with the exception of the lip, as designed by Fred Bingham in his excelltent book on boat building joinery. (See above)
Friday, July 16, 2010
Working on both ends of Nina
 Coaming for cabin top hatch dry fit in place. Since this picture it has been epoxied in place. There will be a lip of 3/4" wide x 1/4 in ply added to the top of the coaming fitted flush to the inside of the opening. This will aid in deflecting any water from the opening. The hatch cover will fit over all and contain weather stripping that will (should) fit tightly onto the ply lip. Hinged aft and secured forward with a clamp.
 Checking the look of a cast bronze vent for the motor well cover. The vent plus three 2 inch holes drilled in the back of the cover should provide adequate ventilation plus oxygen for the motor, especially at idle.
Thursday, July 15, 2010
Hatch Ideas from the Web

 These suggestions are great but I am going to go in a different direction for my cabintop hatch. I plan to rely more on weather stripping that bulk to seal the hatch. May work, may not, but I, having been married three time, am always the optimist. I believe I can build a low profile, weather tight hatch from materials at hand.
Cabintop hatch routed out
 Standing on the potty cover I can easily reach forward to access cleats and anchor
 Opening for the hatch. Coamings will be 3/8 inch plywood that will be one inch proud of the cabin top. The forward cabin bulkhead rises only 10 inches up from the foredeck. This allows me to lean forward easily and is why it is built low. The downside is a restriction of headroom in the forward part of the cabin but is a reasonable tradeoff as I consider the cabin shelter in nasty weather and otherwise the low cabin does not impact the value of the cabin as a sleeper. The hatch also allows male users of the potty to stand in the footwell and remain vertical if they desire.
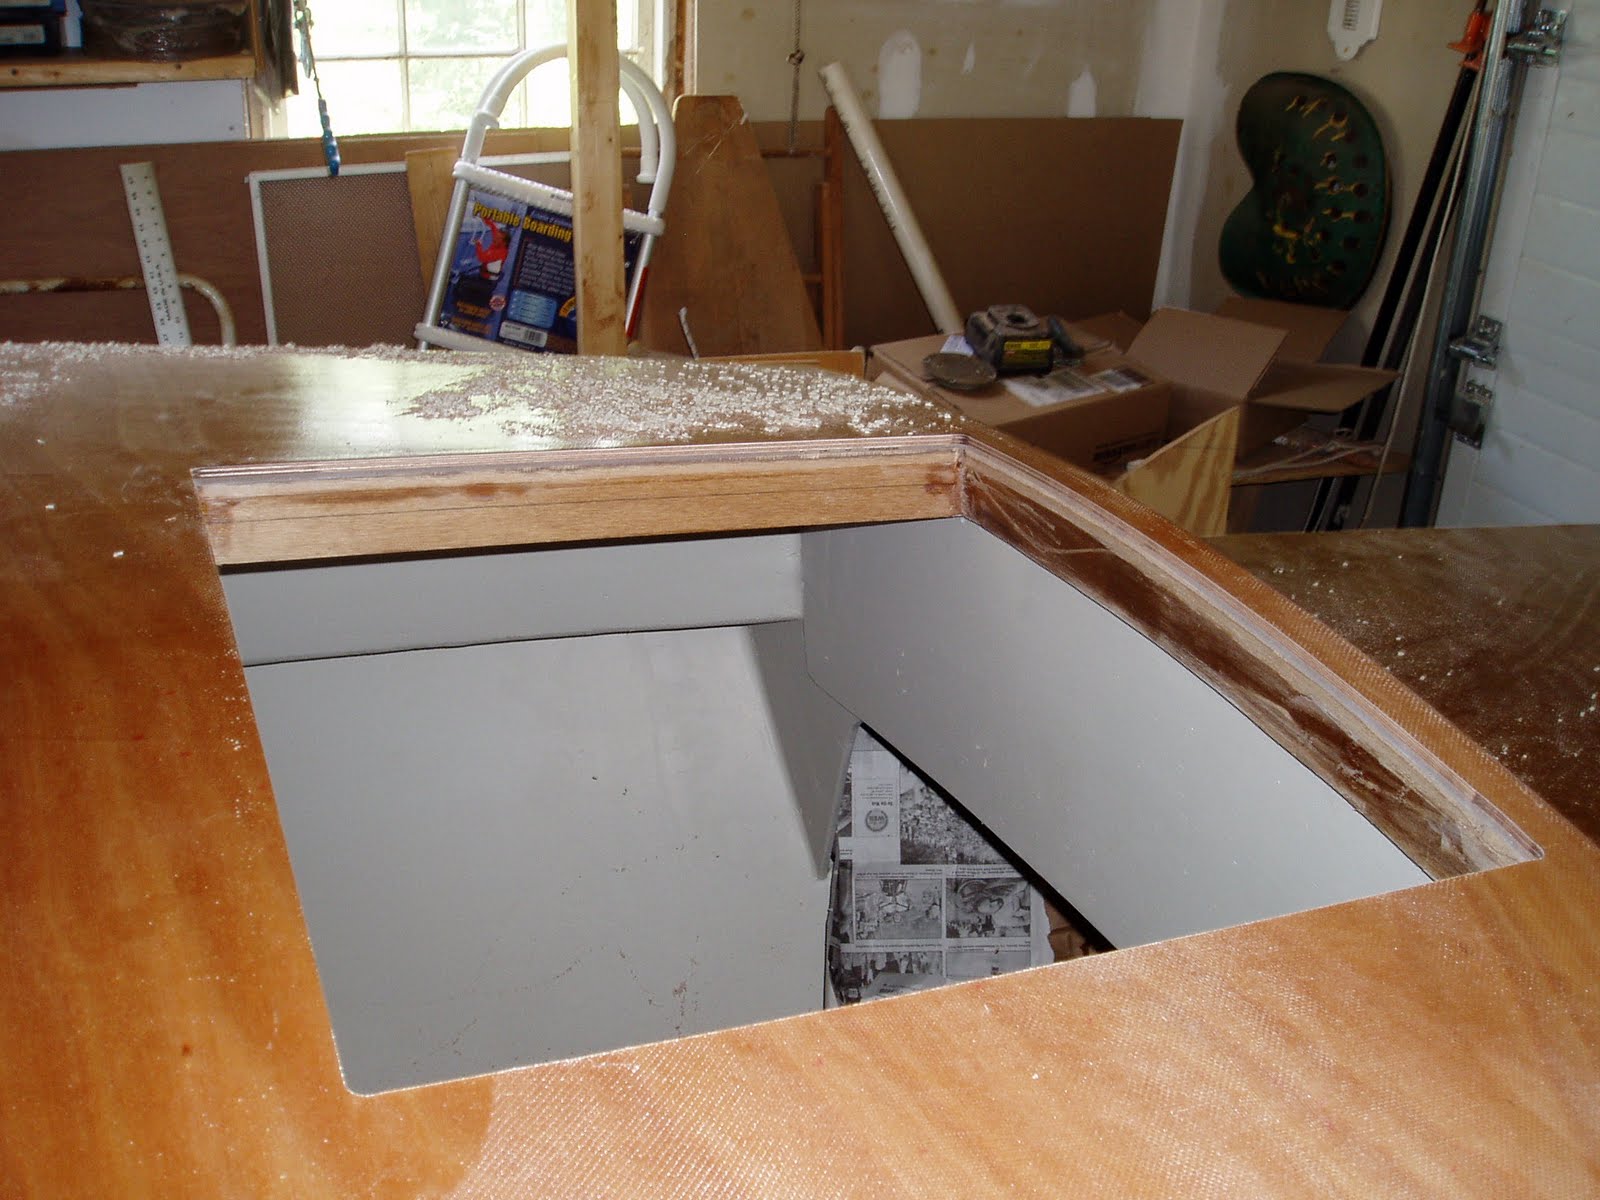 The bottom edge of the coamings will be 3/4 inch up from the hatch framing to make a pocket for a screen insert.
Wednesday, July 14, 2010
Possible Port lites for Nina
 Three salvaged Wilcox Crittenden bronze portlites with a 1/2 inch spigot. Heavily coated with many layers of paint, but no biggie, 4 inch for the cabin front and one 6 inch on each side of the cabin. Cool.
Newest Addition
 1974 Boston Whaler Squall Sailing Dinghy
 All in very decent shape, other than a little dirt and 300 pounds of water trapped between the hull and liner. How to get it out? Took 6 or us to get it in my pickup
Thursday, July 8, 2010
Cabin Roof Glassed

 Standing in cockpit looking over cabin
 Drain for anchor locker visible on hull, glassing foredeck next....
Wednesday, July 7, 2010
Foredeck Trimmed and Ready for Glass
 Bow cleats will be cut into what Harry Bryan refers to as buffalo rails (not shown but ready to install after glassing. Buffalo rails are "taller" than toe rails and will terminate in a false stem (not shown or made yet.)
 Hardware set roughly in place, anchor on new bronze chocks, new bronze (souvenir of Mystic) pennant holder and salvaged bronze chain pipe and bow cleat.
  I should be able to access all from a hatch cut into the top front of the cuddy roof.
Subscribe to:
Posts (Atom)