Bill Hazelett, a local business man, has donated a new building at the museum to house part of the museum/s extensive collection of boats. The new building was necessary because there was no building large or tall enough to house Hazelett/s iceboat, Storm King, a 100 year old of immense proportions. Check out the museum's website for more information
Monday, July 19, 2010
The Lake Champlain Maritime Museum
Bill Hazelett, a local business man, has donated a new building at the museum to house part of the museum/s extensive collection of boats. The new building was necessary because there was no building large or tall enough to house Hazelett/s iceboat, Storm King, a 100 year old of immense proportions. Check out the museum's website for more information
Lift hatches as designed by Fred Bingham
 Here is a page from Bingham's excellent book on wooden boat joinery. The hatch design I chose was A as the simplest of the designs and one that I felt would be adequate for the conditions that Nina would face. At this point I have installed the coamings that are the immovable part of the hatch along with an innovative addition of a lip designed to turn back water before it could overwhelm the fixed coaming. (see additional postings) When the epoxy has set up I will sand, trim, round over and saturate exposed wood. The next step will be to build the lift hatch itself which will consist of 3/8 inch sides and 1/4 inch ply top. The final steps will be glass and hardware.
Making progress on Lift Hatch
 3/8 x 3/4 inch lip added to the top of the hatch coaming.
 The lip protrudes 3/8 inch beyond the coaming and will turn back (I hope) any water that surges against the coaming. The hatch is, with the exception of the lip, as designed by Fred Bingham in his excelltent book on boat building joinery. (See above)
Friday, July 16, 2010
Working on both ends of Nina
 Coaming for cabin top hatch dry fit in place. Since this picture it has been epoxied in place. There will be a lip of 3/4" wide x 1/4 in ply added to the top of the coaming fitted flush to the inside of the opening. This will aid in deflecting any water from the opening. The hatch cover will fit over all and contain weather stripping that will (should) fit tightly onto the ply lip. Hinged aft and secured forward with a clamp.
 Checking the look of a cast bronze vent for the motor well cover. The vent plus three 2 inch holes drilled in the back of the cover should provide adequate ventilation plus oxygen for the motor, especially at idle.
Thursday, July 15, 2010
Hatch Ideas from the Web

 These suggestions are great but I am going to go in a different direction for my cabintop hatch. I plan to rely more on weather stripping that bulk to seal the hatch. May work, may not, but I, having been married three time, am always the optimist. I believe I can build a low profile, weather tight hatch from materials at hand.
Cabintop hatch routed out
 Standing on the potty cover I can easily reach forward to access cleats and anchor
 Opening for the hatch. Coamings will be 3/8 inch plywood that will be one inch proud of the cabin top. The forward cabin bulkhead rises only 10 inches up from the foredeck. This allows me to lean forward easily and is why it is built low. The downside is a restriction of headroom in the forward part of the cabin but is a reasonable tradeoff as I consider the cabin shelter in nasty weather and otherwise the low cabin does not impact the value of the cabin as a sleeper. The hatch also allows male users of the potty to stand in the footwell and remain vertical if they desire.
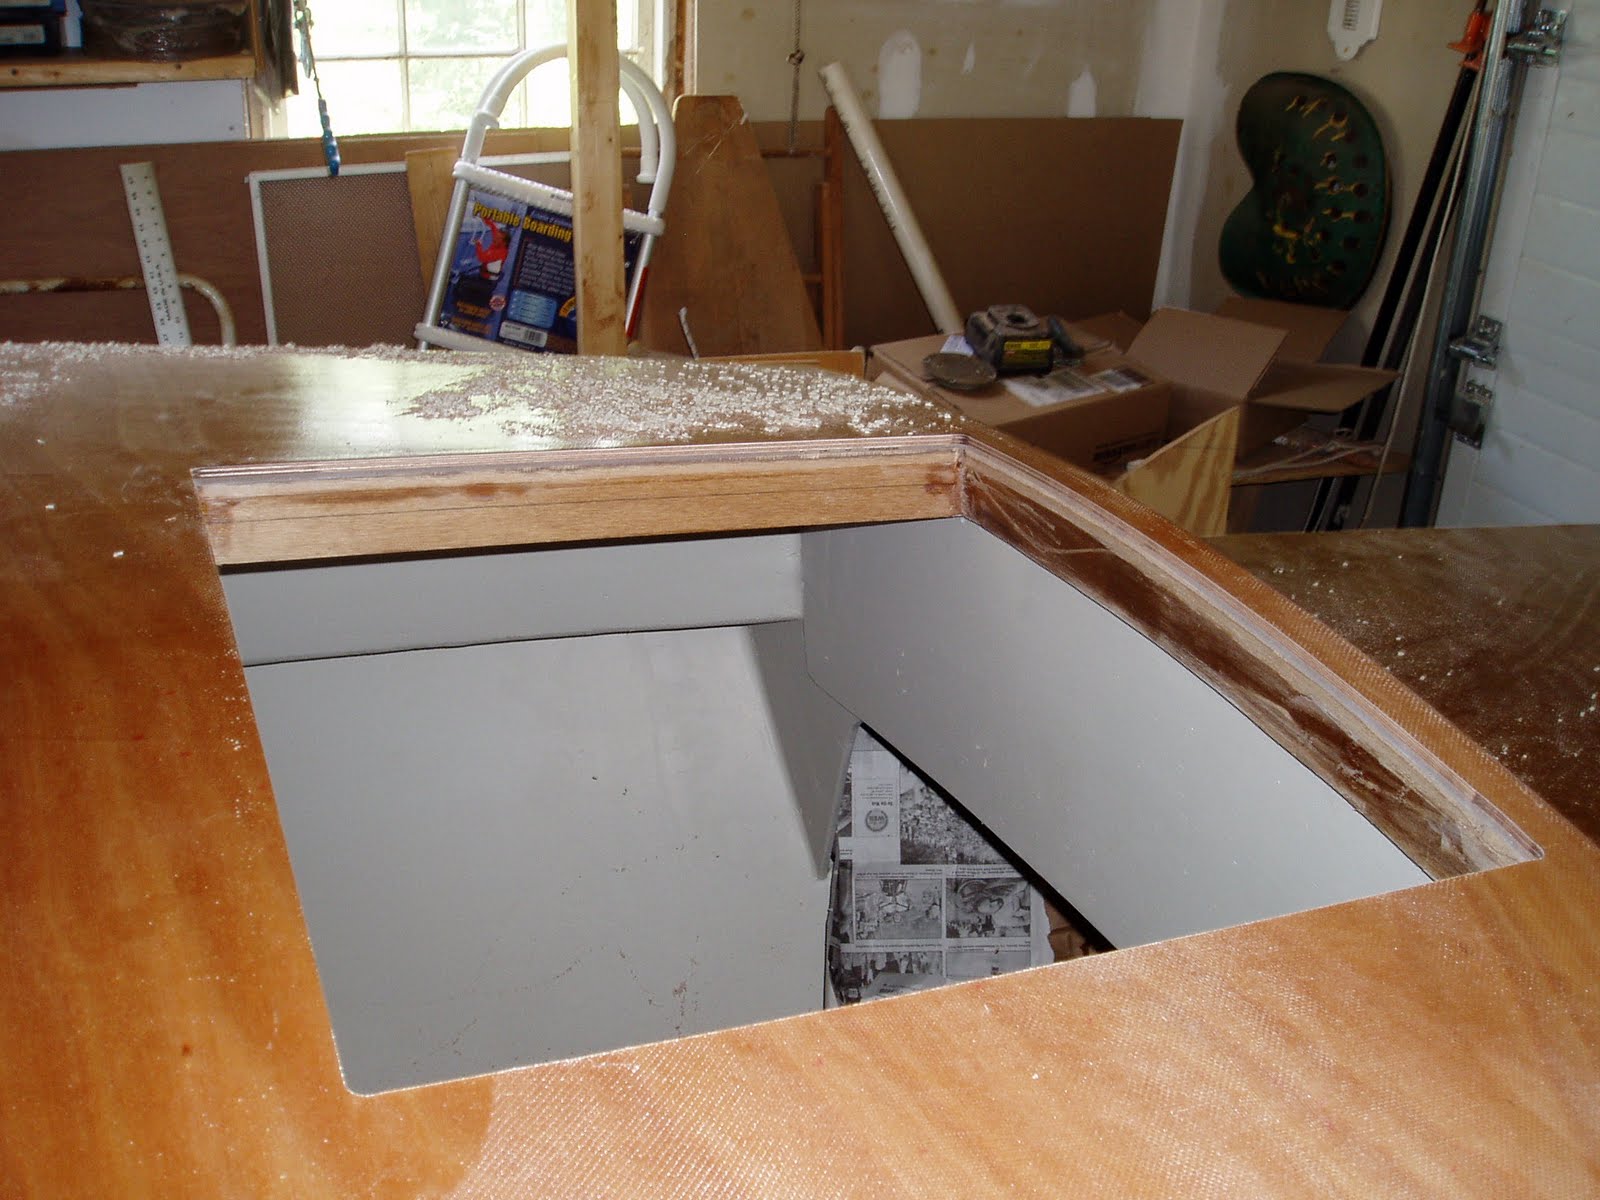 The bottom edge of the coamings will be 3/4 inch up from the hatch framing to make a pocket for a screen insert.
Wednesday, July 14, 2010
Possible Port lites for Nina
 Three salvaged Wilcox Crittenden bronze portlites with a 1/2 inch spigot. Heavily coated with many layers of paint, but no biggie, 4 inch for the cabin front and one 6 inch on each side of the cabin. Cool.
Newest Addition
 1974 Boston Whaler Squall Sailing Dinghy
 All in very decent shape, other than a little dirt and 300 pounds of water trapped between the hull and liner. How to get it out? Took 6 or us to get it in my pickup
Thursday, July 8, 2010
Cabin Roof Glassed

 Standing in cockpit looking over cabin
 Drain for anchor locker visible on hull, glassing foredeck next....
Wednesday, July 7, 2010
Foredeck Trimmed and Ready for Glass
 Bow cleats will be cut into what Harry Bryan refers to as buffalo rails (not shown but ready to install after glassing. Buffalo rails are "taller" than toe rails and will terminate in a false stem (not shown or made yet.)
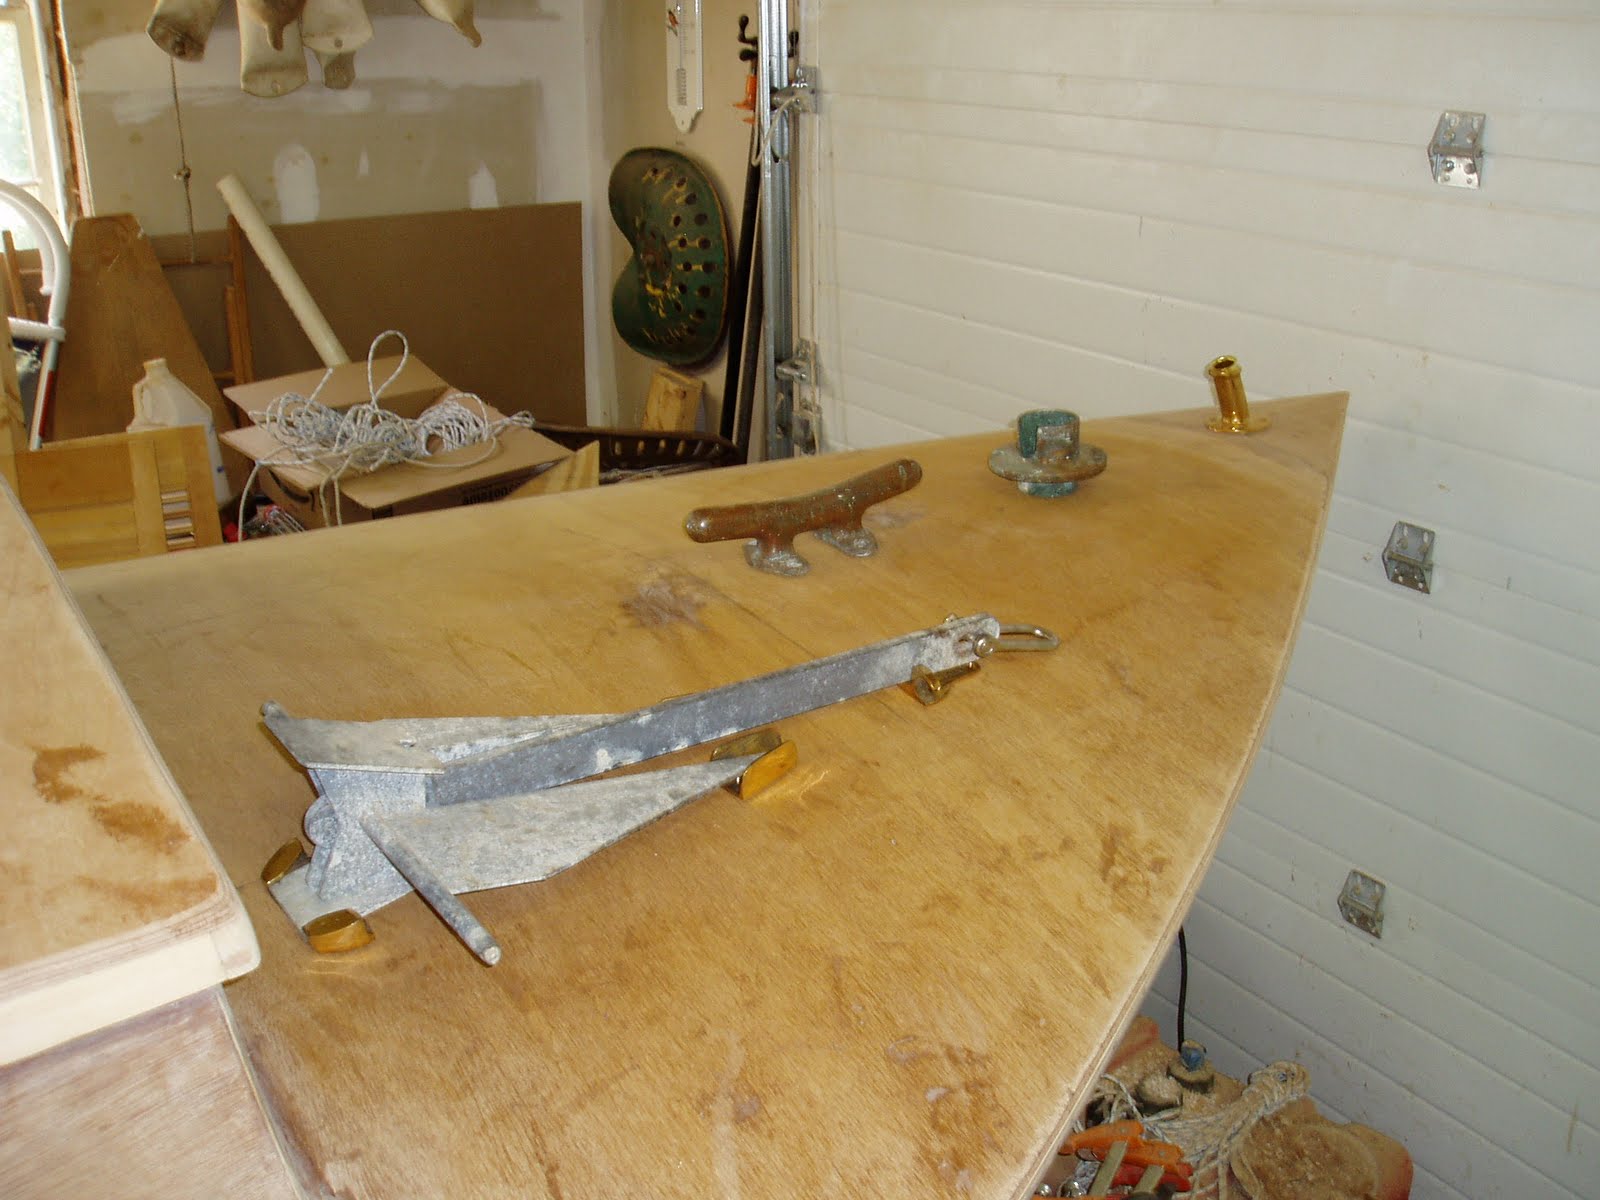
 Hardware set roughly in place, anchor on new bronze chocks, new bronze (souvenir of Mystic) pennant holder and salvaged bronze chain pipe and bow cleat.
  I should be able to access all from a hatch cut into the top front of the cuddy roof.
Tuesday, July 6, 2010
Foredeck clamped in place

 With the help of most of my clamps and a few drywall screws the foredeck is secured. Took the clamps off this morning and trimmed the edges with the roundover bit.
Saturday, July 3, 2010
Scupper Photos
 Looking through the cutout in the false transom. The 2" scupper goes through the transom and is at the level of the sole. Looking above the transom you cane see frame E and the outline of a cutout which is attached to the motor hood. When the hood is raised this cutout gives easy access to the cables and motor. Out of sight is the splash well floor which spans the space between frame F and the true transom.
 This photo shows frame F (you can just see the cutout that is part of the motor hood) with a seat base on each side and in the distance you can see the 2" cutout for the scupper in the true transom. The finished product will have a full bench seat, the center part removable (as in the picture). When the seat is in place it will only extend down 3" from the top surface. This extension is to give the center part of the seat necessary stiffness. Perhaps there will be a battery on the starboard side and a portable 6 gallon gas tank to port. Both will be pretty much out of sight tucked under the side seats.
Friday, July 2, 2010

Cabin Roof Installed
 Cabin roof made from less than one sheet of 1/4 inch Okume
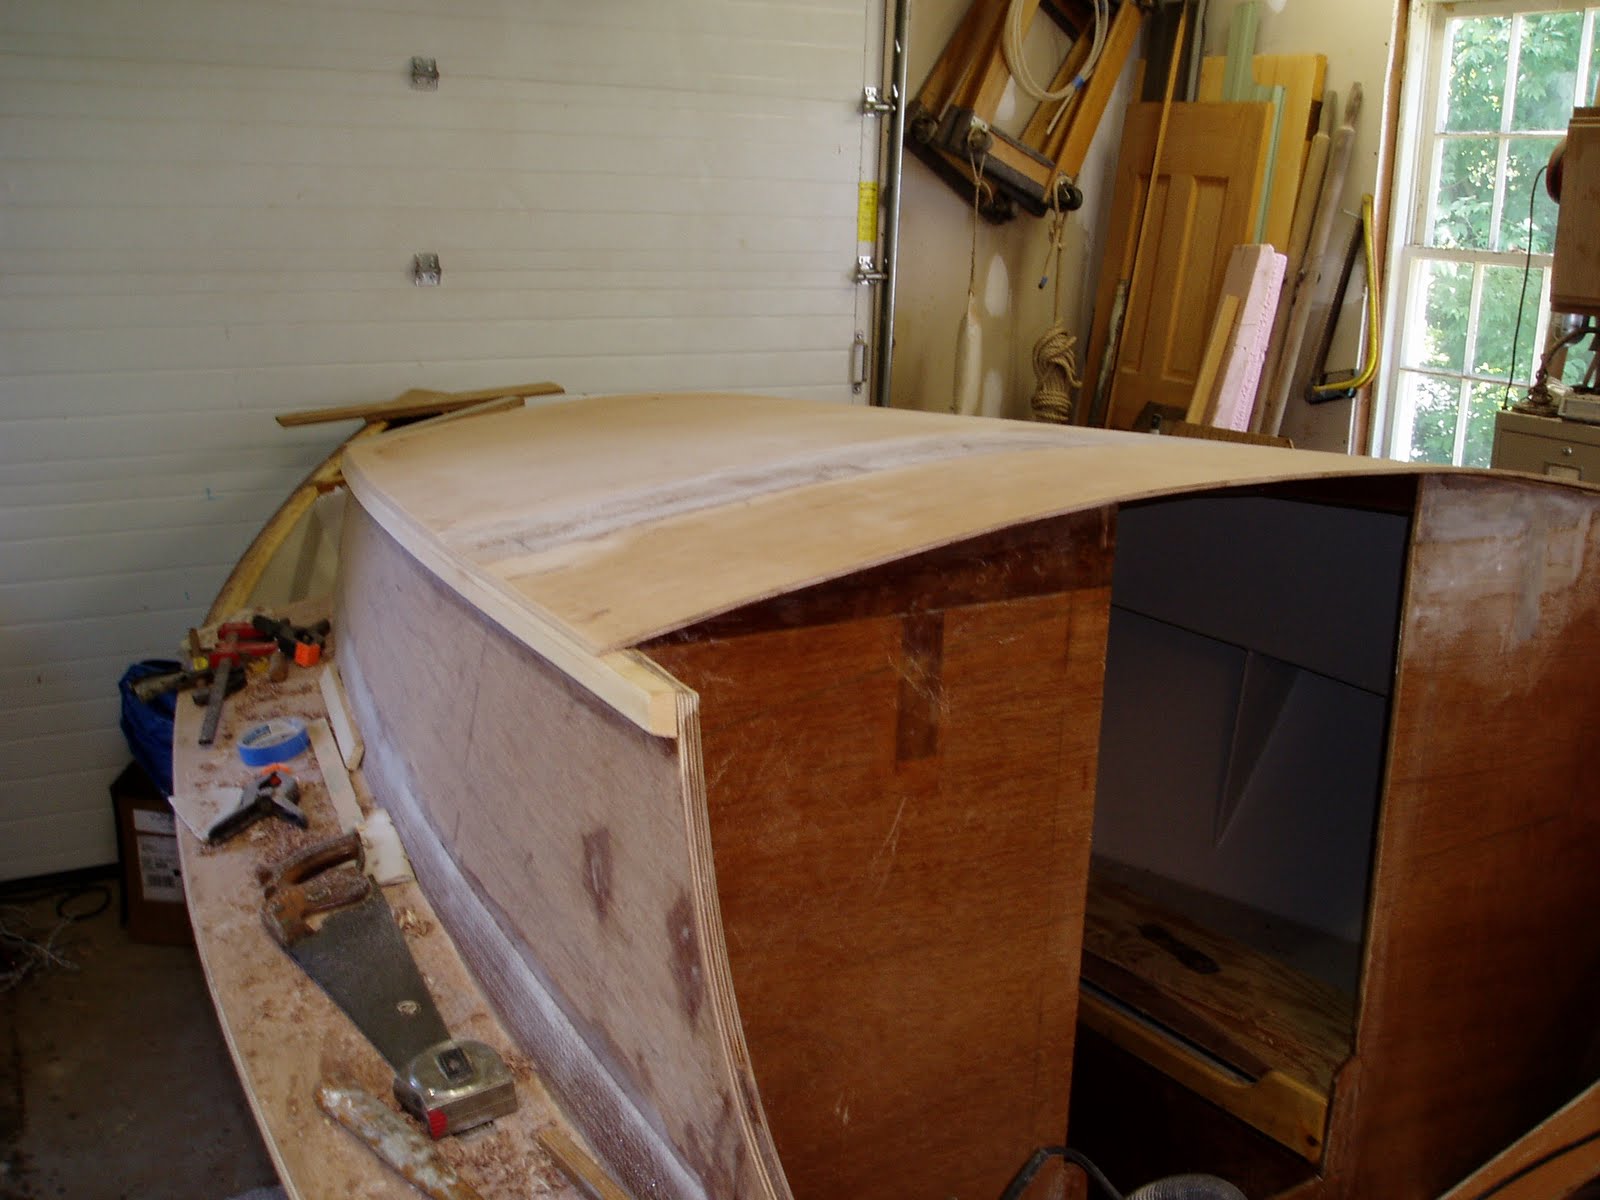 Roof trimmed and rounded for installation of glass
Subscribe to:
Posts (Atom)