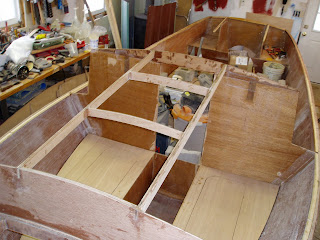
 Yamaha finally sent me the sheet with the mounting hole dimensions for the F25. Made this jig for drilling the holes, three layers of 3/4 inch ply for a depth of three inches. Drilled the holes oversize (3/4 inch), filled with thickened epoxy and will redrill just over correct size for a bit of wiggle room. Worth all the work to protect the transom from rot.
Sunday, January 31, 2010
Jig Made For Drilling Transom
 Yamaha finally sent me the sheet with the mounting hole dimensions for the F25. Made this jig for drilling the holes, three layers of 3/4 inch ply for a depth of three inches. Drilled the holes oversize (3/4 inch), filled with thickened epoxy and will redrill just over correct size for a bit of wiggle room. Worth all the work to protect the transom from rot.
Friday, January 22, 2010
Side decks roughed in
Looking forward from the cockpit
Fooling around with ideas for the helm
 I have two of these tractor seats and my daughter insists they would make great helm and first mate seats. The milk crate indicates where a rearward facing seat might go. The helm seat is at about 26 inches from the floor which gives good visibility over the cabin. The rear facing seat attached to the helm seat will make a great step for getting in and out of the boat. Still trying to decide on the console.
The seat back
 If you could imagine a horizontal line across the seat back 15 inches up from the sole and two vertical lines extending vertically upward from it to the edge of the gunnels you would have the fold down seat back. The hatches over the motor well and side storage along with the fold down seat back allow access to the motor and storage areas. There will be a bench seat across the back with storage under.
the motor well
Port side storage area
Working on the motor well area
Friday, January 8, 2010
Welcome to Winter in Vermont
 Poor old truck needs some digging out. The following posts show my most recent progress on building Nina. Slow going, need to start each work session with building a fire in the shop of Wonderdog Boatworks, waiting for all to warm up and then getting on with it. Wish I had done more last summer, fall and, oh well, here we are.
Motor Well
Foredeck framing
View of the modified motor well
Finally Laid the Sole in Nina's Cockpit
Subscribe to:
Posts (Atom)


